How to install Ubuntu server - step by step guide
What is Ubuntu server and what can it do?
Ubuntu server is a Linux distribution used by servers. It does not come with GUI (Graphical User Interface), only a command prompt, so configuring it may be a bit scary for someone. Ubuntu is a distro loved by many, because it is very friendly, easy to use and very well maintained and supported (both by devs and community). That’s why it is a very popular choice for many hobbyists. It comes in different flavours, and one of them is already mentioned Server edition. As the name implies, it is used to be deployed headlessly (without need for having user input) as a server. What server? That depends entirely on you, and what packages you install. It can be an FTP server to host files, a web server to host your awesome blog, a database for your accouting software maybe, and a lot more. The sky (and your hardware) is the limit, so be ready to explore it, because once you get into it, it is hard to stop.
But in order to explore the sky, we need an airplane. And as our imaginary airplane, we will use the Ubuntu Server edition. But we need to install it somewhere. Let’s see, how we do that in the first place.
Preparing everything
First of all, we need to download the system image. You can do that from download page of Ubuntu server‘s official page. What image you choose depends on you - if you have immediate internet connection, you can go for minimal image, that will download rest of the OS from internet. If you will connect the server to internet later, you have to go for full or DVD edition (don’t be confused, you don’t have to install it on DVD). Those are much larger, so keep that in mind, because you will need much larger flash drive.
Now, you have to decide where to install your system. You can do it either in some virtualized environment like VirtualBox (my case), or on dedicated machine (your old PC for example). Having it in VirtualBox is however dependant on your host system (that is the system which is running it), so when you shut down what host system, your VM will also turn off. It is great for practice tho. I DON’T RECOMMEND IT DEPLOYING COMPLETE SOLUTION TO VIRTUALBOX. For obvious reasons. This tutorial will either assume that you have a dedicated computer for that server, or you know how to create VM in your preferred hypervisor. VMs are good for learning, but are a bit harder to set up. You can find many tutorials on how to create virtual machine in VirtualBox online.
Creating bootable USB media
This process is extremely simple. All you need is a USB flash drive, I recommend 16GB of size at least, and depending of what hardware you have, as fast as you can get. Any USB3.0 flash drive will be more than enough.
Next, download Rufus. It is a small program used to create bootable media. We will install that, open and set some things up.
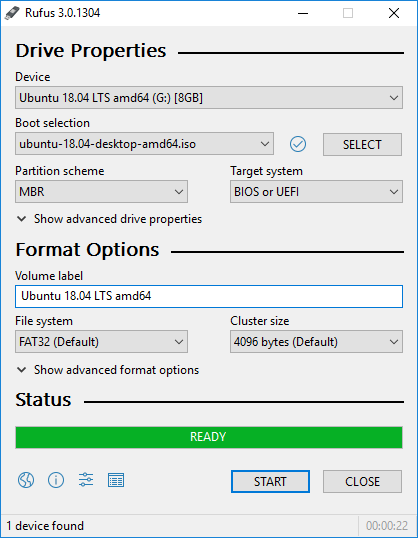
First, select your device (your flash drive) on which you want to install the OS. If you are not sure which one is the correct, disconnect all the others, because this process will completely wipe out all data that was on that drive.
Then, select your iso image. Click on SELECT button, and locate your iso image you have downloaded earlier. Leave rest of the settings to default, they should change automagically for best. For sanity check, partition scheme should be MBR and target system BIOS or UEFI. You can then proceed to rename your drive (i.e. Ubuntu 20.10 server minimal), leaving file system as FAT32 and cluster size to 4096 bytes. Click on START and let it do it’s thing. When it’s done, congrats. You have created bootable USB drive.
Setting up your hardware
Server is not a machine, but a role. Server can be virtually any computer, like your old desktop, notebook, Raspberry or specialized multi-million dollar machines. While you are downloading iso or creating your flash drive, be sure to check that the system you are installing on follows these criteria:
- is 64 bit compatible (almost any hardware past Pentium 4)
- has at least of 2GB of RAM
- has a working drive with at least 32GB of capacity
This server might run 24/7 if you want your services to be available at all times. So make sure it has good enough power supply and cooling. If you are using older hardware, now may be the time to dust it, replace thermal paste and noisy fans. When we are done, only required cables that needs to be connected are ethernet cable and power cord, so you can put that machine somewhere where it won’t bother you with noise. Keep in mind tho that the machines needs to breathe, so if you were to put it inside a closet, make sure the doors will always be open a bit, so hot air can escape and it won’t overheat.
Installing the OS itself - individual steps
Now that everything is ready, connect your server to power, ethernet, connect your keyboard, monitor and bootable USB you have just created. Power on the system, and you should see a screen like this:
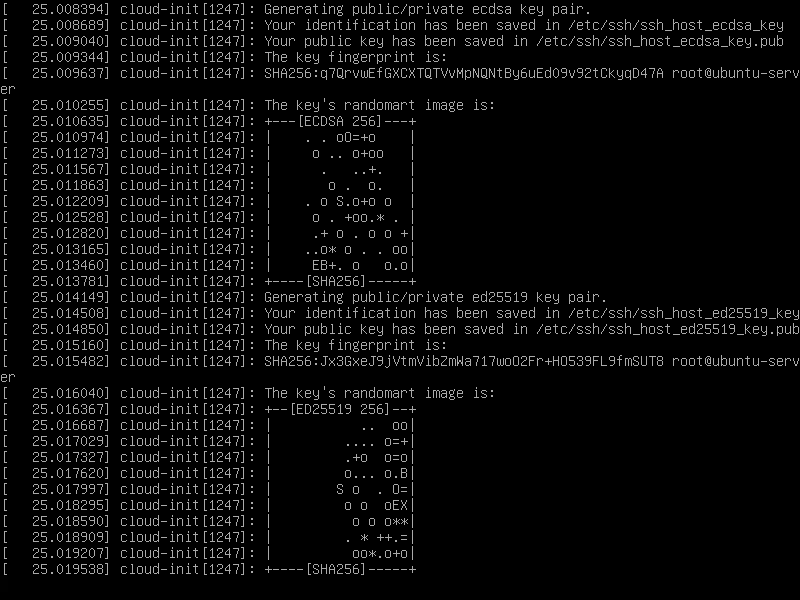
Don’t panic, this is just how it looks when Linux is booting up. It is giving you info about how it is going. This may take a while, so be patient.
Welcome screen
Next, you should see a screen with red banner that says “Welcome” in many languages, and a prompt to select your language. I won’t add screenshot to every step, just when it is necessary. So pick your language.
Installer update
Next, you might see a prompt that says that an installer update is available. If you see that, let it update - Update to the new installer.
Keyboard layout
After either updating or selecting your language, you will have to pick your keyboard layout. That means where zour Y and Z are alongside other special characters. Pick whichever one you are most used to. There may be multiple variants of one layout available (like QWERTZ or QWERTY, with extended backslash or without, etc). If you are not sure, just pick one that is localized in same language as your mother tongue is (expecting you write mostly in that with that keyboard).
Network configuration
Configuring network can be a bit tricky. Above, you can see the screen for configuring it, and we will have to pay extra attention here. First line that says some random letters and numbers like enp0s3 in my case is your interface - what network card is used. In most cases, you will have only one, so you don’t need to touch that setting. What is interesting for us tho, is the second line, that begins with DHCPv4. This is the line used to configure our IP address. It can be either dynamic or static. Dynamic means it will change after each reboot, but you don’t have to configure anything - everything will be handled by your DHCP server (usually your router). Static IP will be preserver at all times, but requires a bit of configuration, and knowledge of your home network. You will have to pick an unused IP address, withing your local range.
I don’t recommend using dynamic IP, because after reboot, your server may become inaccessible. While setting up static IP can be a bit difficult, I have provided a very comprehensive guide, that should be easy to follow.
Setting up static IP address
Hop on some other PC for a second, open terminal (or cmd if you are on Windows) and type ipconfig. It will give you bunch of stuff like this:

What we are interested in is the Ethernet adapter Ethernet section, more accurately it’s IPv4 Address line. That is your local IP address. We will also need Default Gateway‘s IP. Write both of these down. Our IPv4 will tell us what subnet we have, and what IP NOT to use. If your IP starts with 192.168.x.y, then that is your subnet. It may also be 10.x.x.y. x denotes variable number, that can be different for each of us, and also says what’s our subnet suffix. y is then denotation of individual devices, not subnet. This will be unique for each device on that subnet. Your PC may have 5 at the and, while your phone may have 17 on the end.
So let’s get practical. Select the first interface, click enter, select “Edit IPv4”, change “IPv4 Method” to “Manual” and follow. If your IP is 192.168.1.2, then your subnet will be 192.168.1.0/24. Address will then be some address that is NOT used by any other device. To be sure, pick something around 200. This will replace the y variable in the example above (i.e. the last number). So 192.168.1.200 will be our address. Gateway address is whatever address your router has - you can either find that on the bottom of it, or you should have it from previous when we looked at the ipconfig. Name servers and your DNS servers, we can put two of Google’s DNS servers - 8.8.8.8 and 8.8.4.4, separated with a comma. Search domains can stay empty. So your config should look something like this:
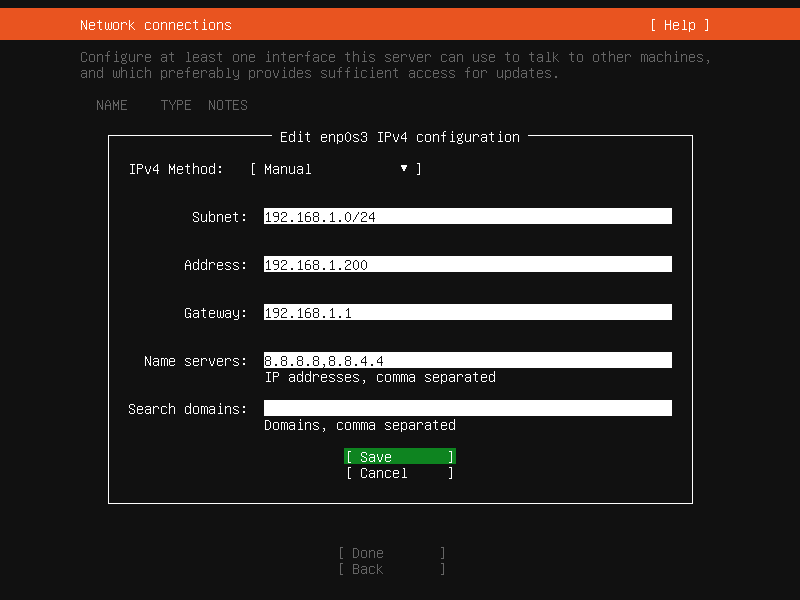
Now press save, and it should automatically connect and change the button on bottom to [Done].
Proxy configuration
If your network has proxy, enter it’s IP address(es) here. If you don’t know what a proxy is, then you probably don’t have one and you don’t have to worry about it. Leave that empty and continue.
Mirror address
A mirror is a server that provides you packages that you can install from it. If you have connected to the internet succesfully, it should automatically pick the best one for you. Usually you can leave that on default and continue.
Storage configuration
Here you can choose on which disk the OS will be installed. If you have only one disk, you can just press Done and skip to the next step. If you have more of them, you will need to change to the correct one from the list. We won’t be encrypting the disk, and we can leave the option of setting the disk in an LVM group on.
On next screen, you should see a summary of how your disk will be laid out. You can see that mount point / (your system) is on LVM we have said should be created, and /boot mount has it’s own partition (so that the BIOS can know where to look for system). Under USED DEVICES, we see that a new LVM group is created named ubuntu-lv and is mounted at /. On the bottom, you can then see the actual physical disk and it’s partitions - there should be at least 3. One very small, around 1MB as “BIOS GRUB spacer“, one around 1GB in size for /boot mount and then rest of the disk your LVM (or system) folder. If everything checks out, press done. Mind that this will completely wipe out the disk before, so if you have any data on it, you will lost it after installation.
Profile setup
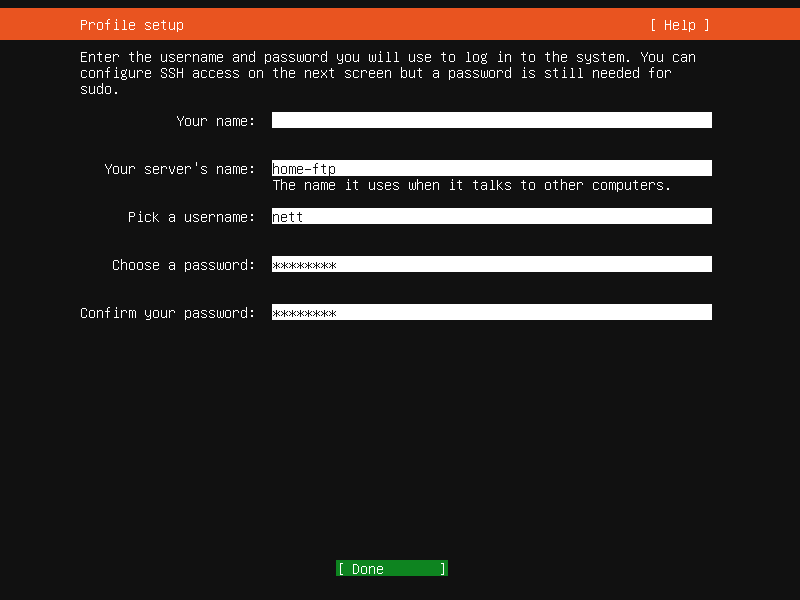
Your name can be left empty, it is only used as informational element. Your server’s name is important, because that is your hostname, or how your server will be identified on the network. We will enter something like home-server, so we know what server it is. Username and password are pretty straight forward, just don’t forget the password because that is your root user and password (equivalent of Administrator).
SSH setup
SSH is used for remotely accessing your server. Since our server will be left in closet, it will be pretty annoying to bring monitor and keyboard there every time we want to configure something on it, so we will install SSH server. This will allow us to connect to the server’s shell (terminal) from other computers. We won’t import an existing SSH identity (assuming you don’t have one), and we will have to Allow password authentication over SSH, otherwise we won’t be able to log in.
Featured services
Now it’s a good time to read throught the list and decide, if you want to also run some of these on your server. Features listed are are NOT everything you can do, they are just featured. I won’t explaint what either of them are, you can read that on the internet. You can select services with spacebar, and then continue.
Finish, reboot
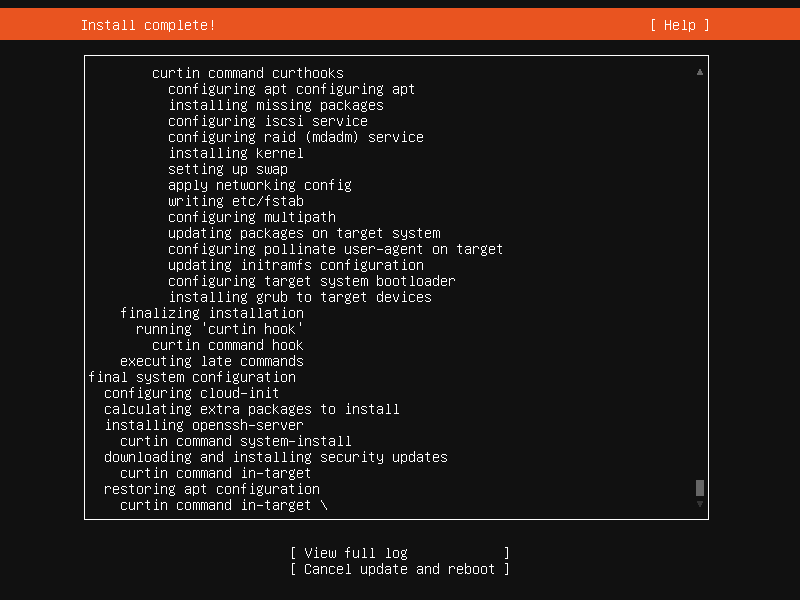
Now the system itself should be installing. Leave that go, there should not be any errors or any other prompt for a while. It may take a while, depending on your USB drive and your system specs. After everything is done, there should be a button with “Reboot now“. Go ahead and press that. It should prompt you to remove the installation medium (the USB drive) and press ENTER. Do as it says. Your PC should now reboot, and after a while, you should see loads of text with green [ OK ] fly by. That is again a Linux system booting, and checking if everything is fine. Now there should be a login prompt similar to this:
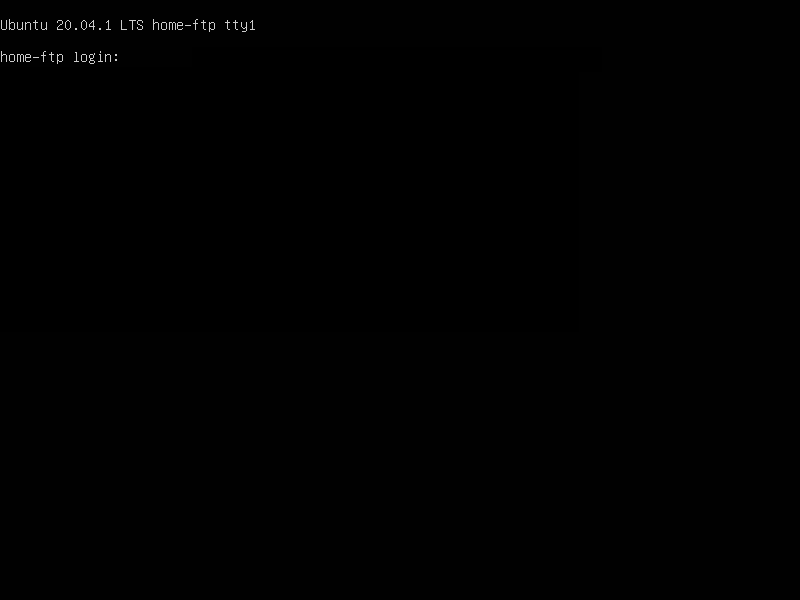
If some text will still pop even after it prompts you to log in, don’t worry, just some late starting software is giving us info. We can safely ignore that. Enter your username and password combo you have specified during installation, and you should be greeted by a welcome message and a prompt.
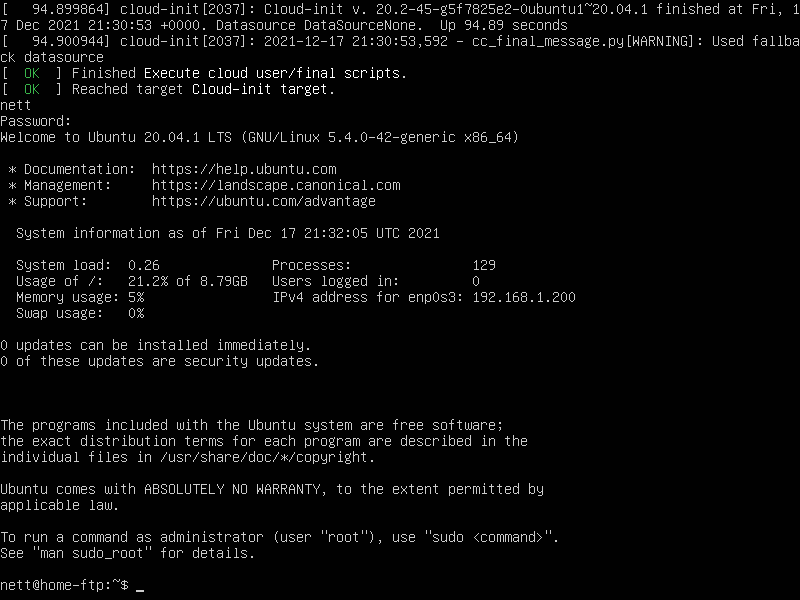
Congratulations, you have succesfully installed and logged into your Ubuntu server.
After installation
Now you can do whatever you want to do. Install some services, configure them or whatever else. Before that, it is a good thing to see if everything is working correctly. This will take only a few minutes, but ensures you that all of your peripherals are working, that you have internet connection and you are running latest updates.
Run htop command, that will show you a very Matrix style looking screen. On there, only thing you want to verify is if your memory is detected and properly installed. If you have 8GB of RAM, you should see xxxM/8G in Mem line. That is correct. You can exit by pressing F10. Next, we will update all our packages, with these two lines:
1 | sudo apt update |
First line will update the mirror list (servers from where to download software), and second line will download and install latest versions of all the software we have installed. This is done automatically, and it will replace existing versions with new ones.
That is everything. If you have configured everything correctly, it should update, meaning your internet connection is working. Now, you can do what you want to do. I’m writing tutorials on how to install different services like FTP server for files, web server, database server and many different, so stay tuned, because maybe you will want one of those running on your local network.